Tampilkan postingan dengan label with. Tampilkan semua postingan

Sabtu, 24 Desember 2016

Samsung bios password with 12 up to 18 digit System Disable Code

,
Samsung bios password with 12 up to 18 digit System Disable Code
If you see the sceen below, after entering awrong Password for the third time, i can help 100% guaranteed!.
just email me the comlete 12 up to 18 digit system disable code and you get a unique Master Password to unlock your Laptop.


That will remove all bios passwords, guaranteed on any Laptop with 12 up to 18 digit System Disable Code
No need to ask for your model, it works on all!.
You will get full access all Bios settings.

Price: $10
(include your Service Tag with the payment)
You will get 100% of your money back if my solution doesn’t work !
Read more

Sabtu, 21 Mei 2016

Never Miss a Moment with HTC Radar

,
The Shoot and share phone that lets you capture 5 images in just 1 click.
HTC Radars briliant camera lets you capture the moment exactly as it happens. And with easy sharing, your friends can see your photos and videos right away.


Ultra sensitive low light sensor, 5 MP camera with burst mode, easy tag and share on social media networks.


The intuitive HTC Radar knows you will be bored at times, too. The phone has amazing entertainment features that ensure your journeys will fly by.
With HTC Watch you can enjoy Hollywood blockbusters at your fingertips.
Read more

Minggu, 30 Maret 2014

Canon Resetter Tools for IP MP from Russia with love

,
Dear All Resetters

may be you all already knows this
there is a link from our friend from rusia
to reset canon IP and Mp series
- iP1200, iP1300, iP1600, iP1700, iP1800, iP2200, iP2500
- MP150, MP160, MP170, MP180, MP450, MP460.

the link is in russian
http://www.ipt.nm.ru/

if you wanna see it in english just use google translate, in this link
http://www.google.com/translate?u=http%3A%2F%2Fwww.ipt.nm.ru&langpair=ru%7Cen&hl=en&ie=UTF8

if you use another language, just use google translate in this link
http://www.google.com/translate_t

************************************************************
Kawan- kawan resetter,

mungkin anda sudah tahu tentang link ini
link ini dr rusia, dan berbahasa rusia
digunakan untuk me reset CANON iP dam MP series
- iP1200, iP1300, iP1600, iP1700, iP1800, iP2200, iP2500
- MP150, MP160, MP170, MP180, MP450, MP460.

link is dalam bahasa rusia http://www.ipt.nm.ru/
kalau ingin melihat dalam terjemahan inggriisnya pakai saja google tranlsate di link ini
http://www.google.com/translate?u=http%3A%2F%2Fwww.ipt.nm.ru&langpair=ru%7Cen&hl=en&ie=UTF8

kalau mau melihat dalam bahasa lain pakai google translate di link ini
http://www.google.com/translate_t


Salam Reset

Printer Lovers
Read more

Senin, 03 Maret 2014

PROCEDURAL Particle Pointilism with Dynamic Paint x PyDriver and PyHandler

,
This writing is a case study or research note while I am exploring Blender Dynamic Paint, PyDriver and PyHandler to create tool that does Particle Pointilism Art.

It is not a complex task, but does require a little bit of logic and understanding on how data may flow. The end result may not be something that is productive or polished, however, this one is a good example of procedural thinking.

FIRST TEST: Mario Mushroom Pointilism based on Mario Mushroom Pixel Art.

VISUAL DIAGRAM: Particle Pointilism with DP

I started by sketching diagram. The actual sketch is a lot rougher than below.

CONCEPT + IDEA

To be able to convert an IMAGE/PHOTOGRAPH into Pointilism Art that utilizes Blender Dynamic Paint and Particles.

PROBLEM

  • I believe the current Blender Particle has "limited" ability in term of data being carried on per particle basis. Although Blender Particle can emit Particles with RGB Color that seems to correspond to the objet Emitter UV Image Texture RGB Value, we cannot really easily query per Particle RGB color.
  • Dynamic Paint + Particle Color does not directly read UV Image Texture RGB Value. However, the color can be updated during animation and it assign that color to paint on canvas.

SOLUTION

Creating some kind of setup so that we can "sample" Pixel RGB Color (U and V) by referencing object position in 3D (X and Y).

STEP 1: Function to Track Object Position

import bpy
import math as math

ob = bpy.data.objects[ReferenceCube]

# If Reference Cube transform is different to actual pixel
# use ratio multiplication 
ratio = 1

# HELPER FUNCTIONS: Get Cube Position
def getCubePosition():
    x = ob.location[0]
    y = ob.location[1]

    print(X Position:, x)
    print(Y Position:, y)
    print(Pixel X Position:, math.floor(x / ratio))
    print(Pixel Y Position:, math.floor(y / ratio))
    
    return( math.floor(x/ratio),math.floor(y/ratio) )

myPos = getCubePosition()

Test the code and see if it is working:


Here I am tracking the X and Y position of an object called "ReferenceCube", which is a Float (decimal number) value and I know I will need to convert those value into Integer for Image Pixel Color on UV space. The RETURN value of this function is the final Integer value needed to sample Pixel Color.

ON SCREEN TEXT VALUE VIEWER (OPTIONAL)
I think it would be nice if we are able to see and visualize DATA VALUE changing while we are modifying object in real time or during timeline playback (if not real time).

I will attempt to do that using Text Object and Python PyHandler.


Below is an example of script that does it, providing we pass on value into the BODY of Text Object(s). Before running the script below, create a few Text Objects, give it a specific name to reference. I am using Text Object with name "floatXpos", "floatYpos", "xpos_text", and "ypos_text". But the name can be anything. I hard-coded the name of object to track just for simplicity.

# UPDATE TEXT
def updateText(scene):
    ob = bpy.data.objects[ReferenceCube]
    x = ob.location[0]
    y = ob.location[1]

    myPos = getCubePosition()

    fxpost = bpy.data.objects["floatXpos"]
    fxpost.data.body = str(x)
    fypost = bpy.data.objects["floatYpos"]
    fypost.data.body = str(y)
    
    xpost = bpy.data.objects["xpos_text"]
    xpost.data.body = str(myPos[0])
    ypost = bpy.data.objects["ypos_text"]
    ypost.data.body = str(myPos[1])

### SET PYDRIVER
frame = bpy.context.scene.frame_current

### SET PYHANDLER
bpy.app.handlers.frame_change_pre.append(updateText)


The PyHandler code in here is calling that helper function above that updates the Text object BODY value whenever one scrubs on the timeline and/or change the frame number by running the playback. This is totally fine for our purpose. We do not really need to see real-time update the text all the time.

This is the first time I use PyHandler and from my understanding, whatever assigned to PyHandler will get called when certain EVENT is happening. 

Real Time Update Using PyDriver
Alternatively, if we like to see a Real-Time value update, we can use PyDriver.

The simplest way I could think of is to create Custom Properties (set of Key and Value) that gets updated whenever there is changes happening.

Script goes something like below:

import bpy, math

ob = bpy.data.objects[ReferenceCube]

# If Reference Cube transform is different to actual pixel
# use ratio multiplication 
ratio = 1

# HELPER FUNCTIONS: Get Cube Position
def getCubePosition():
    
    print(-*50)
    
    x = ob.location[0]
    y = ob.location[1]

    print(X Position:, x)
    print(Y Position:, y)
    print(Pixel X Position:, math.floor(x / ratio))
    print(Pixel Y Position:, math.floor(y / ratio))
    
    return( math.floor(x/ratio),math.floor(y/ratio) )

myPos = getCubePosition()

def floatXposVal():
    ob = bpy.data.objects[ReferenceCube]
    x = ob.location[0]
    return x

def floatYposVal():
    ob = bpy.data.objects[ReferenceCube]
    y = ob.location[1]
    return y

def xpos_text():
    xpos = myPos[0]
    return xpos

def ypos_text():
    ypos = myPos[0]
    return ypos

bpy.app.driver_namespace[floatXposVal] = floatXposVal
bpy.app.driver_namespace[floatYposVal] = floatYposVal
bpy.app.driver_namespace[xpos_text] = xpos_text
bpy.app.driver_namespace[ypos_text] = ypos_text


We are using PyDriver here. And the advantage of PyDriver is we can see the value updating in real time, whenever there is a changes. In some occassion, we need to force the update of PyDriver, but in this case, it will work nicely.

STEP 2: Function to Get RGB value based on X and Y

Next, we need another helper function that simply query and get RGB value based on specified Image. We have seen a usage of such function in here:

I will simplify the function so that it will simply query RGB value based on user specified X and Y value. The X and Y value will come from the Reference Cube position in 3D, as we have planned.

The code looks like this:

# HELPER FUNCTIONS: Get RGB value

D = bpy.data

test_file = mushroom.png
img = D.images[test_file]
pixels = list(img.pixels)
grouped_list = [pixels[ipx:ipx+4] for ipx in range(0, len(pixels), 4)]

# Get width and height of image (in pixel)
width = img.size[0]
height = img.size[1]

def getPixelColor(x=0, y=0):
    r = grouped_list[x + y * width][0]
    g = grouped_list[x + y * width][1]
    b = grouped_list[x + y * width][2]
    # a = grouped_list[x + y * width][3]
    print(r,g,b)
    return (r,g,b)

# TEST GET PIXEL FUNCTION
# getPixelColor(4,6) # x,y

STEP 3: Set RGB value to Material Color of Reference Cube

Here, I will create PyDriver setup that query the RGB value in realtime and let it pass on the value into the RGB color. This color will then get pass on into Particle and Dynamic Paint automatically.

# SET DIFFUSE COLOR OF REFERENCE CUBE MATERIAL
name = PixelSampling_MAT # reference cube material name
MAT = bpy.data.materials[name]

def setPixelColor(rgb):
    print ("set color of material to pixel RGB value")
    MAT.diffuse_color = rgb

def valueR():
    myPos = getCubePosition()
    rgb = getPixelColor(myPos[0], myPos[1])
    return rgb[0]

def valueG():
    myPos = getCubePosition()
    rgb = getPixelColor(myPos[0], myPos[1])
    return rgb[1]

def valueB():
    myPos = getCubePosition()
    rgb = getPixelColor(myPos[0], myPos[1])
    return rgb[2]

bpy.app.driver_namespace[valueR] = valueR
bpy.app.driver_namespace[valueG] = valueG
bpy.app.driver_namespace[valueB] = valueB


STEP 4: Setup Dynamic Paint BRUSH and CANVAS

We are done with the coding actually.

All below procedure should happens and updates automatically:
  • When Cube is repositioned in 3D, particularly the X and Y location, we are tracking it.
  • The X and Y will correspond to the Pixel RGB color based on Image Texture we have specified.
  • If Cube is around position X and Y, let say X=1.42343 and Y=3.432523, then the Material Diffuse Color of the Cube will change to match the pixel position X=1 and Y=3.
All we have to do is to setup the Cube as BRUSH and create a Plane or something as Canvas.

Run the simulation and there we go, we have procedural POINTILISM ART machine in Blender. With little tweak, we could actually paint using the REFERENCE CUBE itself, Dot by Dot.

Remember that the Reference Cube can be any object and so we can have any shape of stamp, converting tiny square pixels into other shapes, when everything goes to plan.


All and all, at least you are learning some codes that can help you to drive value with another value. PyDriver and PyHandler are two things you want to explore.

The way I see PyDriver and PyHandler is like this:
  • If the value can be animated and can be assigned with Drivers, you can modify it using PyDriver.
  • If the value is sort of hidden (like Text object BODY data), you can access and modify it using PyHandler. I heard that PyHandler can create Modifier "on-the-fly".

BLENDER SUSHI SCRIPT: Pointillism Art (rough script with lots of hardcoded thing, needs clean up)


import bpy
import math as math

print(- * 40)

ob = bpy.data.objects[SamplerCube]

# If Cube Transform is different to actual pixel
ratio = 1

# HELPER FUNCTIONS: Get Cube Position
def getCubePosition():
x = ob.location[0]
y = ob.location[1]

print(X Position:, x)
print(Y Position:, y)
print(Pixel X Position:, math.floor(x / ratio))
print(Pixel Y Position:, math.floor(y / ratio))

return( math.floor(x/ratio),math.floor(y/ratio) )

myPos = getCubePosition()

# HELPER FUNCTIONS: Get RGB value

D = bpy.data

test_file = mushroom.png
img = D.images[test_file]
pixels = list(img.pixels)
grouped_list = [pixels[ipx:ipx+4] for ipx in range(0, len(pixels), 4)]

# Get width and height of image (in pixel)
width = img.size[0]
height = img.size[1]

def getPixelColor(x=0, y=0):
r = grouped_list[x + y * width][0]
g = grouped_list[x + y * width][1]
b = grouped_list[x + y * width][2]
# a = grouped_list[x + y * width][3]
print(r,g,b)
return (r,g,b)

# TEST GET PIXEL FUNCTION
# getPixelColor(4,6) # x,y

# SET DIFFUSE COLOR OF REFERENCE CUBE MATERIAL
name = PixelSampling_MAT #material name
MAT = bpy.data.materials[name]

def setPixelColor(rgb):
print ("set color of material to pixel RGB value")
MAT.diffuse_color = rgb


def valueR():
myPos = getCubePosition()
rgb = getPixelColor(myPos[0], myPos[1])
return rgb[0]

def valueG():
myPos = getCubePosition()
rgb = getPixelColor(myPos[0], myPos[1])
return rgb[1]

def valueB():
myPos = getCubePosition()
rgb = getPixelColor(myPos[0], myPos[1])
return rgb[2]


# UPDATE TEXT
def updateText(scene):
ob = bpy.data.objects[SamplerCube]
x = ob.location[0]
y = ob.location[1]
myPos = getCubePosition()
fxpost = bpy.data.objects["floatXpos"]
fxpost.data.body = str(x)

fypost = bpy.data.objects["floatYpos"]
fypost.data.body = str(y)

xpost = bpy.data.objects["xpos_text"]
xpost.data.body = str(myPos[0])
ypost = bpy.data.objects["ypos_text"]
ypost.data.body = str(myPos[1])

rgb = getPixelColor(myPos[0], myPos[1])
rgbt = bpy.data.objects["rgbValue_text"]
rgbt.data.body = str(rgb)

### SET PYDRIVER
frame = bpy.context.scene.frame_current

bpy.app.driver_namespace[valueR] = valueR
bpy.app.driver_namespace[valueG] = valueG
bpy.app.driver_namespace[valueB] = valueB

### SET PYHANDLER
bpy.app.handlers.frame_change_pre.append(updateText)


NOTE:
I do not know how Blender would handle large image. So far, I tested with 16 x 16 Mario Mushroom Pixel Art. I will give it a try with a larger image after I post this blog. Maybe it will crash or simply running really slowly on the machine.

However, all goes well and sometimes you got lucky, and Blender does magic one again.

TON (2013)

1024x1024 Pixels, 2500 Samples, 3 hours calculation, 3 x DP Brush in Torus Shape.

*Original photo of Ton is from the Internet, which is cropped and resized to 512x512 pixels. Copyright belong to photographer.


STEVE (2013)

1024x1024 Pixels, 2800 Samples, 3 hours calculation, 3 x DP Brush in Torus Shape.

STEVE JOB (2013).
Based from that famous photograph by ....
Below is a more detailed version, using Apple logo as dynamic Ink Stamping, instead of regular spherical dots. The point of every dots are procedurally spread across the image.

2048x2048, 4400 Samples, over 10 hours.


INSPIRATION: William Betts Surveillance Art (pixel art using CCTV image)
As part of the Creator Project, this artist is recycling CCTV image and create a setup that actually paint a giant canvas, dot by dot (like the old dot matrix printer). Quite clever.
http://thecreatorsproject.vice.com/blog/cctv-footage-as-art-the-work-of-william-betts

INSPIRATION: Street Art in Germany
Was Blender ever made for this kind of Art creation? Dont know, keep experimenting.
http://youtu.be/fhL3XgkMiMk
Read more

Kamis, 13 Februari 2014

Learning Public Speaking with Toastmasters

,

A few months back, it was my first time to get invited to give a talk. I personally believe that I have to start somewhere and that was a good place to start.It was a privilege to get invited to talk and after that seminar, I decided to improve on my skills.

I was in search for a place where I could learn to talk in public. After doing a little Google search, it just gave me some weird results like "English language school", "Language partner", etc. It's not what I want. I wanted to learn how to speak in front of a public, not have an english conversation.

Read more »
Read more

Selasa, 11 Februari 2014

Create a Time lapse Video with Debut

,
Youve seen videos that condense hours and hours of time into a short clip: a flower blooms in 30 seconds, or a city scene showcases the busy flit of people and traffic as the shadows of buildings move slowly across the street.

You can easily create your own time-lapse video using your webcam and Debut video capture software. Here is what you need to do:
  1. Click the Edit Output button and select the devices tab.
  2. Select the option to Enable Time-lapse.
  3. Specify how often you want an image to be taken. For the charactaristic choppness of many time lapse videos, space image captures apart by a minute or longer. For a smoother result, take captures at shorter intervals.
When your recording is finished, it will be saved as one video clip rather than a series of images, so you can watch the time fly by in a resulting video.

Next, to turn your time-lapse into something really worth sharing, add a title screen using VideoPad video editor. Keep in mind that VideoPad can also do other time manipulations, such as speeding up or slowing down your video footage, in case you want to fine-tune your time-lapse results.

Read more

Kamis, 30 Januari 2014

Do More with Video Blog Carnival March 4 2013

,
do more with video Here are this editions entries to Do More with Video:

Jason Brubaker presents How To Avoid Filmmaking Headaches posted at Filmmaking Stuff, saying, "A filmmaker has a gazillion things to do, but it is important to make sure the legal clearance paperwork doesnt get dropped. You need to have legal clearance for everyone and everything associated with your movie."

Lance Carr presents Shooting Better Home Videos posted at The DIY Video Editor, saying, "Part one of a six part series of articles on shooting better videos."

Matthew York presents Video Is Everywhere! posted at VideoMaker, saying, "there’s some seven billion people on the planet; more than 311 million in the U.S. YouTube tells us that in 2011 it had more than one trillion views — approximately 140 views for every person on Earth."

You might also be interested in: That concludes the first edition of Do More with Video. If you have a video story to share from home movies to video production submit your video blog posts for the next edition.
Read more

Rabu, 22 Januari 2014

Getting Started with Revit Architecture

,
Download Revit Architecture free ebook " Getting Started with Revit Architecture"
A useful ebook for Beginners
The book contains the following basic chapters
  1. Introduction . . . . . .
  2. Creating a Project . . .
  3. Creating Walls . . . . .
  4. Creating Terrain . . . .
  5. Adding Exterior Walls .
  6. Adding a Roof . . . . .
  7. Adding Floors . . . . .
  8. Adding Interior Walls .
  9. Adding Doors . . . . .
  10. Adding Windows . . . .
  11. Adding a Curtain Wall .
  12. Attaching Walls to the R
  13. Modifying the Entry De
  14. Adding a Sloped Floor .
  15. Adding Stairs and Railin
  16. Modifying the Roof . .
  17. Documenting the Proje
  18. Creating a Solar Study .
  19. Creating a Sheet . . . .
Download Getting Started with Revit Architecture free ebook
Read more

Sabtu, 11 Januari 2014

Shooting with Long Lens

,
I believe it is very important to experiment and explore different techniques and refresh our viewpoints on photography perspectives from time to time, to further spur the growth of the photography in us. It is unwise to stay stagnant and be complacent with one set of rules and stick to limited knowledge in defining what good photography is. The journey has no end, and there is so much more to explore if the photographer has the heart and passion to do so. Similarly this applies to street photography. There are so many ways to go about shooting on the street, and there really is no right and wrong. Everyone sees things differently, everyone has their own unique artistic vision. Developing the artistic sense comes hand in hand with using a varying set of tools and methods to translate the vision into photographs. 

All images in this entry were taken with Olympus DSLR E-5 and Zuiko Digital 50-200mm F2.8-3.5 lens

Breakfast of the Champions
Found this shirtless dude sitting at the Taxi Stand. Perhaps it was too hot, that he had to take his shirt off and cool down with a cold can of Tigers. For some reasons it was overbearingly hot this morning. 


Umbrella
What works for me in this photograph was the colourful and beautiful flowery pattern on the umbrella, against plain white dress on the lady. I attacked her at a vulnerable time, she was crossing the road, hence she was looking out for any approaching vehicles. Not the best approach for street, but I like the natural undisturbed feel to this image. 

Harsh Malaysian Sun
The girl was wiping sweat off with the white towel, and I waited until she turned her head around to have the eye contact. 

Chillax at the Balcony
This would probably not quality as street photography, because it was a residential zone, shooting in peoples home. I was expecting the guy to have some rejection, but to my amazement, he smiled instead !! So I shot a few more frames. I think it is crucial to keep a positive outlook, and be optimistic. 

Bite It Off
One of the few things I do very, very often: HEADSHOT !! I try not to overdo it these days. 

White Dots
I know many people have been complaining on my street photographs containing subject content which appear very depressing or miseable: such as homeless people, beggars, or people with broken legs. Ok, ok, here are some happier, and surely more pleasing looking subjects, which can be easily spotted at KL downtown area, such as the Pavilion. 

Buff Tattoo
Gotta love the tattoos on this dudes arms. 

Purple
Apparently there was some event going on just outside Lot 10 shopping mall, to commemorate the International AIDS Memorial Day. Free condoms were given away. You can see the girl at the bottom left corner going that, the condoms come in purple packages. 

White
There was some property event going on outside Pavilion, this lady was stationed outside to hand out brochures. 

Workers and Beggar
McDonalds workers taking a break, while the beggar was just a meter away. 


For a long duration of time, my staple lenses I have been using when I am on the streets were the 11-22mm F2.8-3.5 and 50mm F2 macro. Those two lenses provided me with almost everything I needed: great wide angle coverage, fast aperture, capability to create good bokeh, sharp, and even medium tele-photo range. The lenses worked very well for my shooting style, which I am slowly, but surely shaping into something I adhere to on every street shooting session. Nonetheless, there are times I would do something unusual, such as today, when I went to the streets with a long lens instead: the 50-200mm F2.8-3.5. Traditionally it is not advisable (you can easily read up everywhere on street photography guides) to use long lens on the street. There are many good reasons supporting why wide angle and normal prime lenses are favorable and worked better for most street shooting, but hey, what is the fun of just following rules all the time? I do not deny the truth in the guidelines written by the experienced and seasoned photographers, and they are valid. On top of that, I also strongly believe that it is important on our own part to do our own experimentation, our own trial and error, and determine what works best for our own shooting preferences. We define our own photography, and our own identity as photographers. 

I have shot with long lens before on the streets, but very rarely these days. I started off with long lens, mainly because I was too afraid to go near my subjects, and was not ready to face the possibility of rejection. As I advanced further I realized people on the streets are really approachable and friendly, hence I used wider lenses, to incorporate more surrounding subjects and backgrounds to support the main subject content in my street photographs. However, I cannot help but have a soft spot for long lenses. There is just something about using a long zoom that gives you that excitement, as if you were sneaking around, stealing some shots from far away. Perhaps, there are more advantages to just the excitement alone. Long lenses have many benefits to photography in general. 1) you get very good bokeh, the longer you zoom, the more bokeh you get 2) the compression effect on the background, meaning you see less background, easier to isolate the main subject and minimizing distractions 3) allowing hard to reach subjects, eg across the road 4) training the eyes to spot subjects from far away. I would not say that a tele-lens is highly recommended to be used on the streets, but if you have not used a tele lens, why not give it a try? At the end of the day, it all comes down to what kind of shots you are looking for, you have to acknowledge the fact that there are some shots that only a long lens can accomplish. 

Some friends I was shooting with this morning. Do check out Scotts beautiful street series which he took in London streets during his work/travel there this year, as well as Lukes wonderful rainy day shots. Show some love for street photography guys !!


I do admit that the bulk and weight of the lele-lens were not something I looked forward to. Walking with something compact and light would have been much more comfortable.

This morning me and a bunch of crazy photo-buddies went along Bukit Bintang area and had our shutter therapy there. The sun was unusually harsher, and it was rather uncomfortable walking around, hence the session was cut short. Nevertheless, I did come home with some shots that I actually liked.
Read more

Kamis, 09 Januari 2014

Fun at Pudu with The Original Pancake

,
When I was thinking about what I could do differently this weekend on my shutter therapy session, I thought about the now underutilized Olympus Zuiko Digital 25mm F2.8 pancake lens. This lens is probably one of the over-looked and under-rated lens from the standard grade Olympus line-up. It is not difficult to see why, I have been shooting more frequently with the High Grade 11-22mm and 50mm macro lenses that offer much more superior image quality, in terms of sharpness as well as shallower depth of field rendering abilities. Also, this pancake lens has a special place in me, since it was the first lens I have purchase as an addition to my original Olympus gear (besides the twin kit lens of course). Remembering the good old days I have had and plenty of great images the 25mm pancake lens has produced, I decided to pair it up with my old yet still very trusty Olympus DSLR E-520. Together with a group of friends, we attacked Pudu this morning. 

All images were taken with Olympus DSLR E-520 and Zuiko Digital 25mm F2.8 pancake lens

Peaceful


Watch where you were going !!

Tired of waiting

By the main road. 

Friendly Greetings

Morning paper

Layers of motion

Work and rest

Small leg

Beautiful Mess

Since location of shoot was Pudu, one of my usual street hunting grounds, there was no problem looking for subjects or approaching the people there, having been there countless times for street shooting now. However, most of the time I was there I was more comfortable shooting with the 50mm F2 macro lens, allowing me a few advantages: 1) being able to shoot from a comfortable distance away from the subject and 2) the ability to blur the background away at F2, for subject isolation. Knowing that a huge part of Pudu shooting would be at the open air wet market area, the background was composed of unimaginably ugly and messy things, using the 25mm lens, at a much wider perspective than my usual preference, would give me a lot of problems when it comes to composition. Arranging my subjects against all the other distractions was the biggest challenge. Not only that, I have to be that much closer to get the kind of images that I seek, and to produce at least some sort of subject isolation (shooting nearer to your subject will have their presence filling your frame, and increase the blur background). 

Oh the joy of shooting with E-520 and the pancake lens was just indescribable. Did I feel at one brief moment that this combination was less than my expectations from my usual gear (E-5 with high grade lenses)? Not really, the autofocus was very fast under bright conditions, and if I did miss the opportunities it was my own fault for not reacting quick enough anyway. The beefy grip on the E-520, though the body was smaller, was good enough for very comfortable and long hour shooting. The small size pancake, almost feather weight on the E-520, was another great advantage, I felt like I was hanging nothing at all on my neck, after so many hours using the much larger and heavier E-5. The E-520 in comparison just screams fun, and that was what I had plenty dosage of this morning. The images the E-520 + pancake delivered were nothing short of satisfactory. They were not perfect, could have been better (add in any 100 reasons of choice on how to improve this set of images) but I was pleased with them. 

I also intended to shoot and presented everything in color, but the weather was terrible, having over-cast and thick ugly white cloud overhanging everything. The color output was dull and boring, creating very flat and uninteresting photographs. Not having the diligence to post-process and add vibrancy to each photo, I decided to convert all images to monotone, and increase the contrast to add the sense of depth. Not something most photographers would recommend you to do, since they would care to preserve the highlight details and not have them overblown. For me, I want my street photographs (bear in mind, this processing is only valid for my street photographs only) to have the whites as white as they can get, and the black to be truly black. 

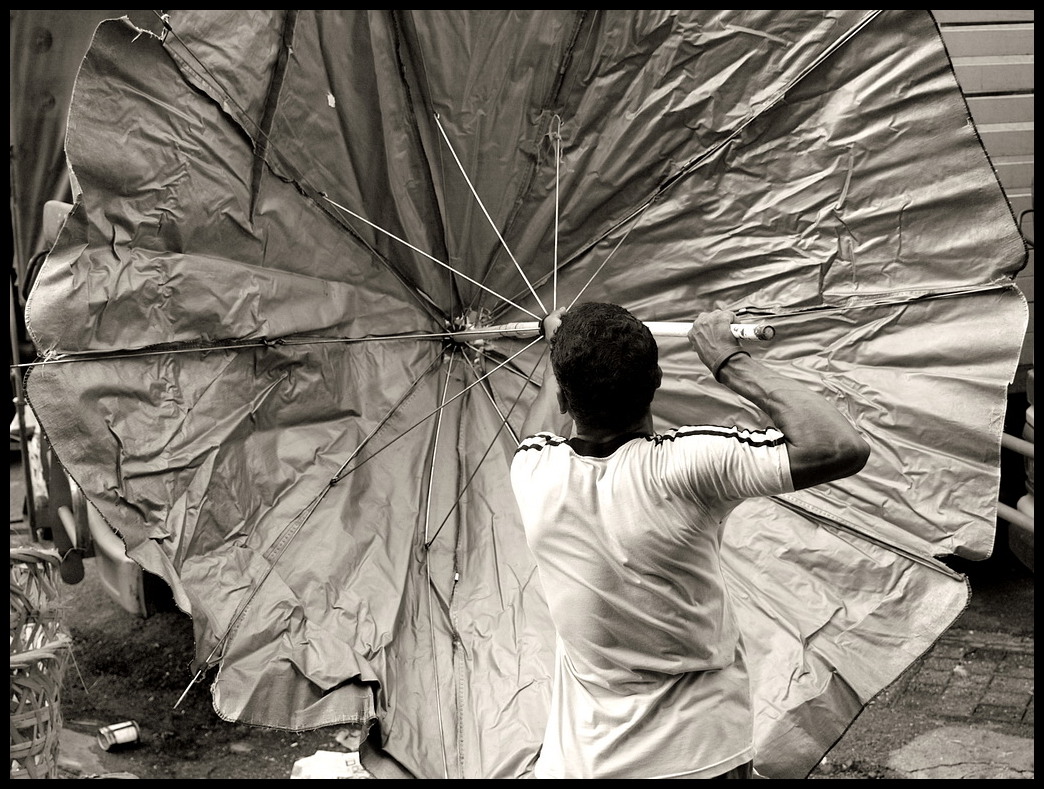
How to kill someone with an umbrella

How to torture a dead chicken

The religious man


Down

Conversation

Waiting

A cup on the knee

Restless

Luke Ding (click blog here) and Nick Wade (from London, UK)

And this was me shooting the image earlier. Photo credit: Kelvin Ng (blog here)

Weekend is here. 

So are you out for some shutter therapy session? Do share some images !!


Read more
 

Computer Information Copyright © 2016-2022 -- Powered by Blogger